Settings
Adding and managing your sessions
Whether you need to add an ad-hoc session to your diary or have it recurring on a regular basis, it’s easy to add fixed time when you’re available to see patients at a particular location. You can view the sessions you’ve added in a list or in scheduler view, which shows how they fit into your working week.
You’ll need to make sure you’ve completed your set up first – click the guides below to find out how.
Adding
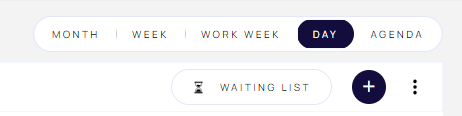
- Click the + symbol on the top right of the screen
- Click Session
- If you’re a practice with multiple practitioners, choose from the dropdown options – the name of a single practitioner will already be populated
- Give your session a name that you’ll understand
- Choose the Specialty and Subspecialty from the options available (taken from your PPR profile if you’ve got one)
- Choose the relevant Location
- Click Next
- Choose the types of appointments you want to make available in the session – for multiple choice just keep ticking your options and click outside the dropdown box to move on to the next step. If you only choose one you’ll see the default duration time which you can amend
- Add the start and end times using the pickers or typing in directly by clicking in the box again or pressing the Esc key on your keyboard
- Add a start date either by typing in the date or by clicking on the diary icon and picking it
- Choose the recurrence:
- Don’t Repeat – this is for a single ad-hoc session
- Daily
- You can choose the interval between each recurrence e.g. 1 for every day, 2 for alternate days etc
- You can apply the session to your work week – which you should have already set up in your General diary settings
- Weekly
- Choose the day(s) of the week and the interval between each recurrence e.g. 1 for every week, 2 for every fortnight etc
- For speed you can apply the session to your work week and adjust the day(s) it relates to
- Monthly
- Choose the interval between each recurrence e.g. 1 for every month, 2 for every two months etc
- Choose if you want it on the same date each month e.g. the 1st, or pick a set day and week e.g. the third Monday
- Choose when you want the recurrence to end:
- By clicking the End by radio button and typing a date into the box or clicking the calendar icon – you can quickly change the year and month by clicking the current month at the top of the calendar
- By clicking the End after radio button and typing in how many times you want the session to appear in your diary
- Click Next
- Add any notes
- Review the details on the right-hand side of the page – click Back if you need to make any changes
- Click Save
Managing
Click the three dotted Manage menu on the top right of the screen (visible on all screens except for Month and Agenda views) and click Sessions.
This will open in Scheduler view on the current week but by moving the toggle at the top right you can view a simple list. If you have multiple diaries, you’ll need to select the relevant Resource (the practitioner) from the dropdown menu.
You can also add a session from this screen by clicking Add Sessions.
Scheduler view
Use the backward (<) and forward (>) arrows next to the date to move backwards and forwards to see the sessions available for the selected week. Simply click on the date to navigate to the month you want to look at and then click on the required week in the calendar.
- The details will appear on the left in the Sessions column – if you’ve got more than one session with multiple appointment types you may need to scroll down to see all the details of each session:
- Icons for info or action
- Name of session
- Active dates
- Time
- Location
- Type of appointments
- Icons:
- Circular arrows = Only shows if your session is recurring
- Pencil = Edit – you can make changes to the location, start and end times, start and end dates, recurrence etc
- No entry = Make the session Inactive – please note that you won’t be able to activate this again
- Dustbin = Delete
List view
This gives you a complete list of all the sessions in a grid layout, with the same information (apart from the type of appointments). Use the icons in the Action column:
- Pencil = Edit – you can make changes to the location, start and end times, start and end dates, recurrence etc
- No entry = Make the session Iinactive – please note that you won’t be able to activate this again
- Dustbin = Delete

