Diary functions
Making an appointment
You can easily add an appointment by using the menus or directly in the diary.
Adding an appointment directly in the diary
An appointment can be added wherever you want by simply double clicking into the diary. Follow the same steps as below, depending on whether the appointment is in- or outside a session. The only difference will be that the date, start and end times will already be populated. The end time will change depending on the type of appointment required.
Adding an appointment from the menus
You can access this functionality in two ways:
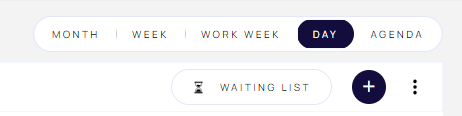
- From the Add menu by clicking the + symbol at the top right of the screen and then clicking Appointment
- From the three dots Manage menu next to the + symbol on the top right of the screen (visible on all screens except for Month and Agenda views) then:
- Click Appointment
- Click Add Appointment
You can now find an available slot and add an appointment either within a session or anywhere in the diary. To find out how to set up your sessions check out our guide.
Find a slot outside a session
- Toggle Find a session to the off position (this is the default) – the right-hand side of the pane will change to show your diary for the next week including sessions and any other appointments already booked outside a session
- Type in part of the patient’s first or last name – this searches your patient list and will return all matching results. If the patient isn’t in your database you’ll need to add them into your patient list first and then make the appointment
- Choose the type of appointment – you’ll need to make sure you’ve set these up first. Check out our guide on Appointment settings
- Choose the relevant Location – if you’re looking for a specific session, toggle on Find a session at the top of the pane (see below)
- Use the forward (>) and backward (<) buttons at the top right of the pane to scroll through the coming weeks until you find a suitable time or click on the date and choose a week from the calendar. Click Today to quickly get back to this week
- Click the time required – even if this is outside your normal working hours
- Alternatively, you can enter the start date and time by clicking in the box and typing or by clicking the calendar icon – the end date and time will automatically be updated
- Click Next
- Type in the Reason for visit if you know it – the diagnosis or symptom the patient is suffering from
- Add any notes
- You can also add one or more instruction that you’ve already set up – this is detailed in our guide on Appointment settings or you can add a new one at this stage
- Click Add Instruction
- If you’ve already written some, toggle Search existing templates to the on position, choose from the dropdown options and click Add
- If you’d like to add a new instruction now, simply give it a name and add the text – if these are directions to your location toggle Add as a location direction to the on position – click Add
- You can repeat this step as many times as you need to
- If a translator is required, toggle Translator needed to the on position and choose the language required
- Review the appointment details on the right-hand side of the pane – you can click Back if you need to make any changes
- Once everything is correct click Save
Find a slot within a session
- Toggle Find a session to the on position – the right-hand side of the pane will change to show you the the current week
- Type in part of the patient’s first or last name – this searches your patient list and will return all matching results. If the patient isn’t in your database you’ll need to add them into your patient list first and then make the appointment
- Select the session from the dropdown options – the available slots for that session will show on the right-hand side of the pane
- Choose the type of appointment – you’ll need to make sure you’ve set these up first and have added them to the session. Check out our guides on Appointment settings and Sessions
- Use the forward (>) and backward (<) buttons at the top right of the pane to scroll through the coming weeks until you find a suitable time within the required session – or click on the date and choose a week from the calendar. Click Today to quickly get back to this week
- Click the time required which will turn green
- Click Next
- Type in the Reason for visit if you know it – the diagnosis or symptoms the patient is suffering from
- Add any notes
- You can also add one or more instruction – how to set these up is detailed in our guide on Appointment settings or you can add a new one
- Click Add Instruction
- If you’ve already written some, toggle Search existing templates to the on position, choose from the dropdown options and click Add
- If you’d like to add a new instruction now, simply give it a name and add the text – if these are directions to your location toggle Add as a location direction to the on position – click Add
- You can repeat this step as many times as you need to
- If a translator is required, toggle Translator needed to the on position and choose the language required
- Review the appointment details on the right-hand side of the pane – you can click Back if you need to make any changes
- Once everything is correct click Save

